
Screen caps magic
Whether you are trying to put together a presentation or you want to share a bit of news in an email – or you are trying to present some creative work to a client – screen caps are super useful to capture and explain – well – screens…
On a Mac you used to have this wonderful shortcut of command, control + shift and 4 (which is a bit of a hand full, but well worth the finger acrobatics) and you can start dragging across an area of the screen to take a snap which gets copied into your clip board. So from there you can easily add it to your powerpoint or publishing software without having to go through import processes. Unless you design for print, the quality should be fine.

If you have a Mac with a touchpad, you get a neat little interface asking you if you want to drag across the screen yourself or you want to capture a specific window or just the entire screen. Then you can also specify if your destination is the clipboard, documents, desktop or preview.
If you want to always save your screen caps in a specific location, or if you want to specify a custom location, you can do that, too.
First, click Command + Shift + 5 and your screen will go faded out with a little menu at the bottom. I’ve made a little screen recording of the function to demonstrate.
Once you’ve set this up, you can use the short cut to access that menu. You can go even further than this by checking the absolute short cuts in system preferences.
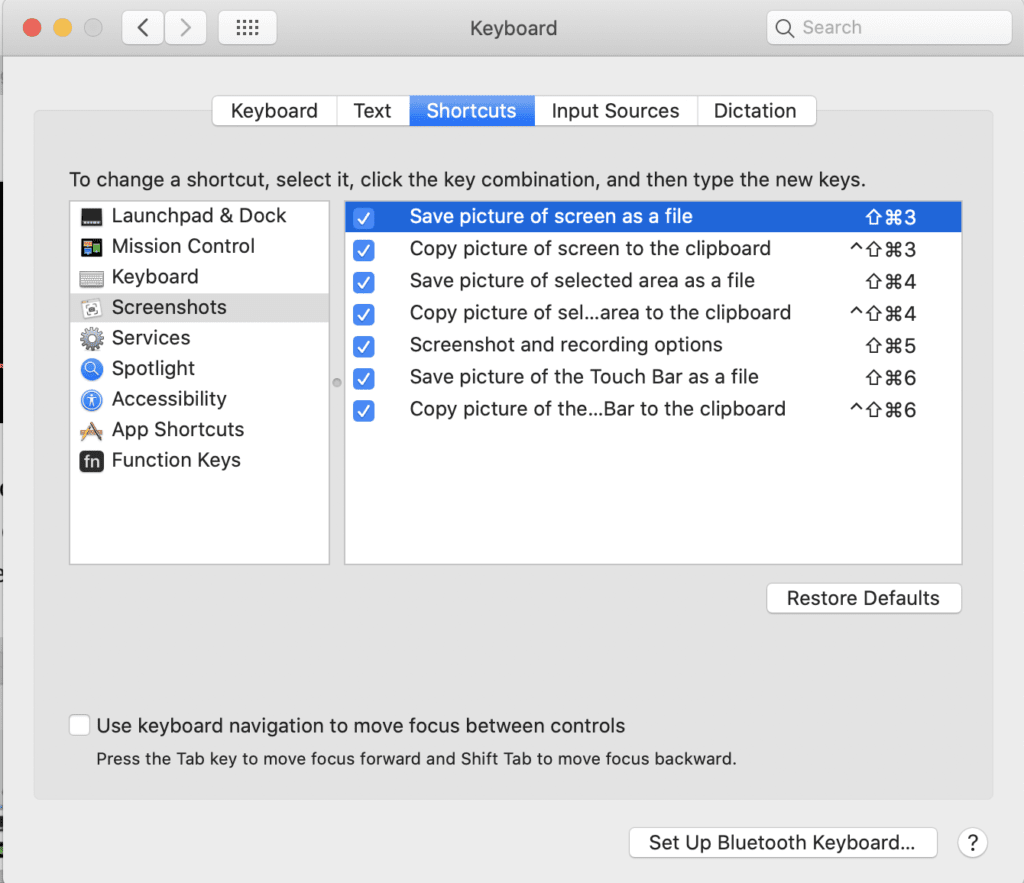
It seems to follow the rule of save to file with command, shift and a number plus option if it’s for the clip board. Definitely one to work with.

Regine Wilber
I am a brand consultant and conceptual designer. I love using creativity to solve problems for our clients. In my spare time, I like jigsaws and probably a bit of a board game geek.

Other Articles


Newsletter
Geeky Bits


